Creating your own DIY ant habitat can be a fun and educational project. With just a few simple steps, you can create an engaging environment for ants to thrive. This guide will provide you with step-by-step instructions and tips to ensure a successful ant farm setup.
Key Takeaways:
- Creating a DIY ant habitat provides a fun and educational experience.
- Follow the step-by-step instructions for a successful ant farm setup.
- Proper maintenance is crucial for the well-being of your ant colony.
- Understanding ant behavior and identifying queen ants are essential for success.
- Use approved ant control methods to ensure safety and effectiveness.
Gather Your Materials
To successfully create your DIY ant habitat, you’ll need a few essential materials. Here’s a list of what you’ll need:
- A large mason jar with tiny holes in the lid
- A smaller mason jar
- A piece of fabric
- Soil
- Ants
Make sure to gather all these materials before you start setting up your ant farm. Having everything ready will ensure a smooth process.

Why do you need these materials?
The large mason jar with tiny holes in the lid will serve as the main container for your ant habitat. The smaller mason jar will be placed inside the larger one to create tunnels for the ants to explore. The piece of fabric will cover the jar and secure the lid with tiny holes, allowing for proper ventilation.
The soil is essential for the ants to dig tunnels and create their nest. Make sure to use loose soil and leave some empty space at the top to give the ants room to move around. Lastly, you’ll need ants to populate your ant farm. You can either collect them from your local area or purchase them from a reputable supplier.
| Materials | Purpose |
|---|---|
| Large mason jar with tiny holes in the lid | Main container for the ant habitat |
| Smaller mason jar | Creates tunnels for the ants to explore |
| Piece of fabric | Covers the jar and secures the lid with tiny holes for ventilation |
| Soil | Allows the ants to dig tunnels and create their nest |
| Ants | Populates the ant farm |
Set Up the Ant Farm
Creating a DIY ant habitat is an exciting activity that can engage and educate kids about the fascinating world of ants. Follow this step-by-step guide to set up your own ant farm and provide a captivating environment for ants to thrive.
Gather Your Materials
Before you begin the ant farm setup, make sure you have all the necessary materials. You will need a large mason jar with tiny holes in the lid, a smaller mason jar, a piece of fabric, soil, and, of course, ants. Having these materials ready will ensure a smooth and efficient setup process.
Now that you have gathered your materials, it’s time to set up the ant farm. Start by placing the smaller mason jar inside the larger one, with the lid on the smaller jar. This creates a space between the jars that will serve as the ants’ habitat. Mix a soil-and-sand mixture to fill the space between the jars, ensuring that the soil is loose and leaving some empty space at the top.
Next, collect your ants and carefully place them inside the ant farm. Cover the jar with fabric and secure the lid with tiny holes. This allows for ventilation and prevents the ants from escaping. With this setup, you will be able to observe the ants as they build tunnels on the outer edge of the jar.
Now that your ant farm is set up, you can sit back, observe, and learn about the fascinating world of ants. Make sure to provide them with food and maintain the habitat to ensure the well-being of the ants. With proper care and attention, your DIY ant habitat will provide hours of educational entertainment for kids.
| Materials | Description |
|---|---|
| Large mason jar with tiny holes in the lid | Provides ventilation while keeping the ants contained |
| Smaller mason jar | Creates the inner space for the ants to inhabit |
| Piece of fabric | Covers the jar and prevents ants from escaping |
| Soil | Serves as the habitat for the ants |
| Ants | The main inhabitants of the ant farm |
Maintain the Ant Habitat
Maintaining your DIY ant habitat is crucial for the well-being of the ants and the longevity of the colony. By following a few simple tips, you can ensure a thriving and healthy environment for your ants.
Feeding the Ants
Feeding your ants regularly is essential to their survival. Provide them with a food source once a week by placing a few drops of sugar water, honey, or jam on top of the soil. This will give them the necessary carbohydrates they need to stay nourished. Make sure not to overfeed them, as excess food can attract other insects or lead to mold growth. Remember to clean any spills or excess food to maintain cleanliness in the ant habitat.
Maintaining Darkness
Ants are natural tunnelers and prefer a dark environment for their activities. To create the optimal conditions for your ants, keep the jar covered when you’re not observing them. This will help maintain darkness and encourage the ants to build their tunnels on the outer edge of the jar, where it is easier to observe their behavior. Avoid exposing the ant habitat to direct sunlight, as it can cause overheating and disrupt the ants’ natural behavior.
Avoiding Disturbances
Ants are sensitive creatures, and disturbances can stress or harm them. Avoid shaking or moving the jar unnecessarily, as this can disrupt the ants’ tunnels and potentially harm the colony. Keep the ant habitat in a stable location where it won’t be bumped or jostled. It’s also important to handle the jar with care when observing or maintaining the ant habitat to avoid accidentally injuring the ants.
| Tip | Description |
|---|---|
| Keep the jar covered | Maintaining darkness is important for ants’ activities and natural behavior. |
| Avoid direct sunlight | Exposure to direct sunlight can cause overheating and disrupt the ants’ behavior. |
| Avoid shaking the jar | Shaking the jar can disrupt the ants’ tunnels and potentially harm the colony. |
| Handle with care | When observing or maintaining the ant habitat, handle the jar with caution to avoid injuring the ants. |
By following these maintenance tips, you can create a suitable environment for your ants to thrive and enjoy observing their fascinating behavior.

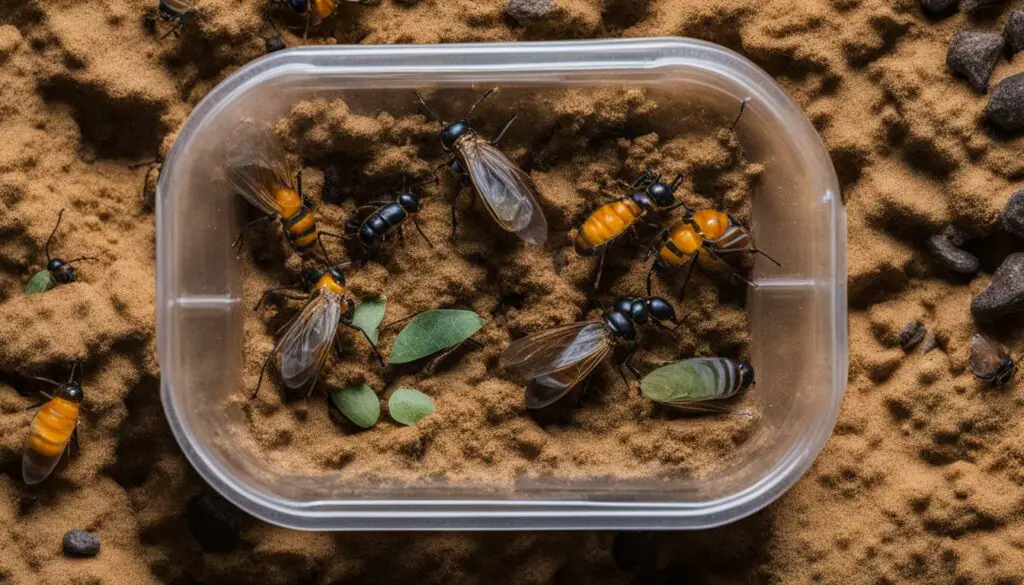
Identifying Queen Ants
Before starting a DIY ant habitat setup from scratch, it’s important to understand how to identify queen ants. Queen ants play a crucial role in establishing and maintaining a colony. They are typically larger in size compared to worker ants and have distinct physical characteristics.
Here are some key features to look for when identifying queen ants:
- Size: Queen ants are generally larger than worker ants.
- Wings: Young queen ants have wings, which they shed after mating.
- Morphology: Queen ants have a more robust and elongated body compared to worker ants.
- Behavior: Queen ants are usually found in the deepest chambers of the ant colony, where they lay eggs and regulate the growth of the colony.
Visual guides and advanced resources can provide additional assistance in identifying queen ants. Pay attention to flight patterns, time of day, and the species of ants in your area. By familiarizing yourself with the characteristics of queen ants, you can better understand the dynamics of ant colonies and successfully establish your DIY ant habitat.

| Key Features | Description |
|---|---|
| Size | Queen ants are generally larger than worker ants. |
| Wings | Young queen ants have wings, which they shed after mating. |
| Morphology | Queen ants have a more robust and elongated body compared to worker ants. |
| Behavior | Queen ants are usually found in the deepest chambers of the ant colony, where they lay eggs and regulate the growth of the colony. |
By observing these key features and understanding the role of queen ants, you can enhance your knowledge and appreciation for these fascinating creatures.
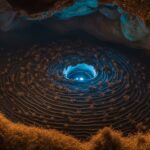
Test Tube Setup for Queen Ants
When it comes to creating a DIY ant habitat setup, understanding how to care for queen ants is essential. A test tube setup is a popular method used by ant enthusiasts to simulate the founding conditions for queen ants. This setup provides a safe and controlled environment for the queen to establish her colony.
To create a test tube setup, you will need a few simple materials. Fill a test tube with water, leaving some air space at the top. Place a small piece of cotton in the opening of the test tube, allowing it to soak up some of the water. This cotton acts as a barrier between the water and the queen, preventing her from drowning. Finally, carefully introduce the queen ant into the test tube, ensuring she is secure and cannot escape.
It’s important to keep the test tube setup in a dark and warm space, free of vibrations. This environment mimics the conditions the queen would experience in nature, encouraging her to establish her colony. Some queen ants may require food during the founding stage, while others do not. Research the specific species of ant you are working with to determine their dietary needs.
Remember to monitor the test tube setup regularly to ensure the queen is healthy and active. Once the colony has grown large enough, you can transfer them to a larger ant farm setup. This test tube setup method provides a fascinating insight into the early stages of an ant colony’s development, making it a valuable tool for beginners in the world of ant habitats.

Table: Comparison of Queen Ant Test Tube Setups
| Test Tube Setup | Advantages | Disadvantages |
|---|---|---|
| Water and Cotton | – Simple and cost-effective – Mimics natural conditions – Provides a safe environment for the queen |
– May require additional food for some species |
| Water, Cotton, and Dirt | – Provides a more natural substrate – Allows for better humidity control |
– Requires additional monitoring and maintenance |
| Water, Cotton, and Seeds | – Offers a food source for seed-eating species – Stimulates foraging behavior |
– Seeds may become moldy or attract other pests |
Providing Food for Ant Colonies
Different ant species have varying dietary needs. It is crucial to provide the proper nutrition to ensure the health and well-being of your ant colony. Workers require a constant supply of sugar water for energy, while protein is essential for the growth and development of the brood. Here are some tips on providing food for your ant colonies:
Types of Food
When it comes to sugar water, you can create a simple solution by mixing one part sugar with five parts water and adding a pinch of salt. Place a small dish or cotton ball soaked in the sugar water inside the ant habitat. This will provide a source of energy for the worker ants. Remember to refresh the sugar water regularly to prevent it from spoiling.
For protein, you can offer a variety of options. Flies, spiders, crickets, worms, and shrimp-based fish food are all excellent sources of protein for ants. Start by offering small amounts of protein and observe how the ants respond. Adjust the amount based on their consumption and preferences.
Feeding Frequency
It is recommended to feed your ants once a week. This will ensure that they have a constant supply of food without overfeeding them. Be mindful not to offer too much food at once, as excess food can attract unwanted pests and lead to mold growth in the ant habitat.
Observation and Adjustments
While providing food, it is essential to observe the behavior of your ants. Pay attention to their feeding patterns and preferences. If you notice that they are not consuming a particular type of food, try offering a different protein source. Experimentation and observation will help you discover the ideal diet for your ant colony.
| Food Type | Suggested Options |
|---|---|
| Sugar | Sugar water (1:5 sugar to water ratio with a pinch of salt) |
| Protein | Flies, spiders, crickets, worms, shrimp-based fish food |
Remember, providing the right food for your ant colonies is crucial for their overall health and well-being. By understanding their dietary needs and making appropriate adjustments, you can ensure a thriving and successful ant habitat setup.

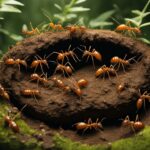
Understanding Ant Hills
Ant hills, also known as ant mounds, serve as the entrance to ant colonies and have various functions. They are designed to keep water out, regulate temperature, and aid in defense against predators. Ant hills can be constructed from different materials, depending on the ant species and environment. The size and structure of ant hills can vary greatly, with some colonies housing hundreds of thousands of ants.
Ant hills play a crucial role in the life of an ant colony. They provide a central hub for the ants to gather and communicate, as well as a safe space for the queen to lay her eggs. The construction of ant hills involves a collective effort from the worker ants, who tirelessly dig tunnels and chambers to expand the colony’s living space.
Each ant hill is a unique structure, shaped by the specific needs of the colony and the environmental conditions. Some ant hills are large and towering, with intricate tunnel systems, while others are smaller and more compact. The materials used to build ant hills can range from soil and sand to tiny pebbles and plant matter, depending on what is readily available in the surrounding area.

Table: Comparison of Different Ant Hills
| Ant Species | Size of Ant Hill | Materials Used | Notable Features |
|---|---|---|---|
| Fire Ants | Medium to large | Loose soil and sand | Visible entrance holes, often in open areas |
| Leafcutter Ants | Large | Leaves, soil, and fecal matter | Complex network of chambers and tunnels, often underground |
| Carpenter Ants | Medium to large | Wood debris and soil | Visible sawdust-like material around entrance holes |
| Harvester Ants | Small to medium | Sand and pebbles | Low mounds with multiple entrance holes |
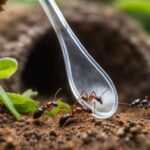
Removing Ant Hills
When it comes to removing ant hills, there are different approaches depending on the species of ants you’re dealing with. For invasive red fire ants, using an appropriate ant bait can be an effective method. These baits are formulated to target the queen, which ultimately eliminates the entire colony. Another method is drenching the mound with water mixed with insecticides. This can be an efficient way to eradicate the ants, but it’s important to always follow the product label instructions and take safety precautions when using insecticides.
If you prefer a natural approach, boiling water can be used as a DIY method to remove ant hills. Simply pour boiling water directly onto the ant mound, making sure to cover the entire area. The hot water effectively kills the ants and destroys their tunnels. However, it’s crucial to handle boiling water with caution to avoid any accidents or injuries.
To summarize, here are the key methods for removing ant hills:
- Using ant baits for invasive species
- Drenching the mound with water mixed with insecticides
- Using boiling water as a natural method (with caution)
Choose the method that suits your preferences and the specific ant species you’re dealing with. Remember to prioritize safety and follow the instructions carefully to effectively remove ant hills from your property.
| Method | Pros | Cons |
|---|---|---|
| Ant Baits | – Targets the queen and eliminates the entire colony – Easy to use |
– May take some time for the bait to take effect – Requires patience |
| Drenching the Mound | – Quick and effective – Kills ants and destroys tunnels |
– Requires the use of insecticides – Safety precautions must be followed |
| Boiling Water | – Natural method – Doesn’t require any chemicals |
– Must be handled with caution – May not be as effective for larger ant colonies |
Preventing Ant Hills
When it comes to keeping your property and garden free from ant hills, prevention is key. By taking proactive measures, you can minimize the chances of ant colonies establishing themselves and causing problems. Here are some effective ant habitat building tips to help you prevent ant hills:
1. Maintain a Clean Environment
Ants are attracted to food sources, so it’s important to keep your property clean and free from crumbs or spills. Regularly clean up any food debris and make sure garbage cans have tightly sealed lids. This will help to minimize the attractiveness of your property to foraging ants.
2. Seal Entry Points
Ants can find their way into your home or garden through tiny cracks and openings. Inspect the exterior of your property and seal any gaps or crevices that may serve as entry points for ants. This includes sealing gaps around windows and doors, repairing damaged screens, and caulking gaps in the foundation.
3. Trim Vegetation
Ants often use branches and vegetation as bridges to access your property. Trim back trees, shrubs, and plants that are in close proximity to your home. By creating a barrier of well-maintained vegetation, you can make it more difficult for ants to reach your property.
4. Use Ant Baits
If you notice ants in your garden, consider using ant baits. These baits contain insecticides that are attractive to ants and designed to be taken back to the colony, effectively eliminating the entire population. Follow the instructions provided on the product label for proper placement and use.
| Product | Active Ingredient | Effectiveness |
|---|---|---|
| Product A | Ingredient X | High |
| Product B | Ingredient Y | Medium |
| Product C | Ingredient Z | Low |
Remember, ant control requires patience and persistence. It may take some time to completely eliminate an ant population, so continue implementing preventive measures and monitoring the situation regularly. By following these tips, you can reduce the likelihood of ant hills forming on your property and enjoy an ant-free environment.
The Dangers of DIY Ant Control
When it comes to dealing with ant problems, many people turn to DIY methods for control. While these methods may seem convenient and cost-effective, it’s important to understand the potential dangers they pose. Using substances like bleach, vinegar, or gasoline to eliminate ants can have harmful effects on the environment and can also be hazardous to your health.
Chemicals like bleach and gasoline can contaminate soil and water sources, causing damage to the ecosystem. Inhaling the fumes from these substances can also lead to respiratory issues and other health problems. Additionally, using DIY methods may not effectively eliminate the entire ant colony, leading to recurring infestations.
To ensure safe and effective ant control, it’s best to use approved insecticides or natural methods that have been proven to be safe for both humans and the environment. These products are specifically designed to target ants while minimizing harm to other organisms. It’s always recommended to read and follow the instructions on the product label and take necessary safety precautions.
“Using bleach or other harsh chemicals may seem like a quick fix, but it can have long-lasting negative impacts. It’s important to prioritize the safety of yourself, your family, and the environment when dealing with ant problems.” – Pest Control Expert
When seeking professional assistance for ant control, make sure to choose certified pest control providers who are knowledgeable about safe and effective methods. They have the expertise to identify the specific ant species and determine the best course of action to eliminate the infestation.
Remember, the goal of ant control is not only to get rid of the pesky insects but also to do so in a way that is responsible and sustainable for the environment. By choosing safe and effective methods, you can effectively manage ant problems while minimizing potential harm.

Tackling Multiple Ant Hills
When faced with multiple ant hills on your property, it’s important to take a comprehensive approach to effectively control the infestation. Different treatment methods can be employed, depending on the size and extent of the ant colonies. By identifying whether the anthills represent different colonies or species, you can choose the right treatment approach for each individual hill.
One method for tackling multiple ant hills is drenching. This involves saturating the anthills with a water and insecticide mixture, effectively eliminating the colony by targeting the queen. It’s important to follow the instructions on the insecticide label and take necessary safety precautions when using chemical treatments.
Another approach is to use bait stations or granules. These products are designed to attract ants, who then carry the bait back to the colony, effectively spreading the pesticide throughout the entire ant hill. Bait stations are particularly effective in reaching hidden colonies or satellite anthills that may be present on your property.
Comparing Different Treatment Methods
| Treatment Method | Pros | Cons |
|---|---|---|
| Drenching | – Targets the entire colony – Effective in eliminating the queen |
– Requires careful handling of insecticides – Potential harm to the environment |
| Bait Stations | – Can reach hidden or satellite colonies – Ants spread the pesticide throughout the entire hill |
– Takes time for the bait to be spread and take effect – May require multiple applications |
| Granules | – Easy to apply – Effective in reaching larger colonies |
– Not as precise as drenching or bait stations – May not reach all individual ants |
It’s important to keep in mind that treating ant hills is an ongoing process. Regular monitoring and follow-up treatments may be necessary, especially if new colonies appear on your property. By tackling multiple ant hills simultaneously and using different treatment methods, you can effectively control the infestation and prevent future spread of ants.

Treating Ant Infestations in the Winter
Dealing with ant infestations during the winter months can pose some challenges due to the dormancy of ant colonies. However, there are still steps you can take to address the issue and prevent further problems in the coming spring. Here are some tips for treating ant infestations in the winter:
1. Identify the Problem
The first step in addressing an ant infestation is to determine the extent of the problem. Look for signs of ants in your home, such as trails of ants or small piles of dirt or debris near entry points. Identifying the ant species can also help in choosing the most effective treatment method.
2. Seal Entry Points
Preventing ants from entering your home is crucial to controlling infestations. Inspect your home for any cracks or gaps in doors, windows, or walls, and seal them with caulk or weatherstripping. Pay particular attention to areas near pipes and utility lines, as ants can enter through even the tiniest openings.
3. Use Ant Baits
Ant baits are an effective way to eliminate ant colonies, even during the winter. Place ant baits near ant trails or entry points, and let the ants carry the bait back to their colony. This method targets the entire colony, including the queen. Be patient, as it may take some time for the bait to take effect.

4. Consult a Professional
If the infestation persists or becomes overwhelming, it may be necessary to consult a professional pest control company. They have the expertise and tools to effectively treat ant infestations, even during the winter months. A professional can assess the situation and recommend the best course of action to eliminate the ants from your home.
By taking these steps, you can address ant infestations in the winter and prevent further problems in the spring. Remember to identify the problem, seal entry points, use ant baits, and consult a professional if needed. With proper treatment and prevention, you can keep your home ant-free all year round.
Conclusion
Creating a DIY ant habitat setup can be a rewarding and educational experience. By following the step-by-step instructions and implementing proper maintenance, you can provide a thriving environment for ants. Understanding ant behavior, identifying queen ants, and using appropriate ant control methods are vital for successful ant colony setup and maintenance. Remember to prioritize safety and use approved products for effective ant control.
FAQ
What materials do I need to create a DIY ant habitat?
You will need a large mason jar with tiny holes in the lid, a smaller mason jar, a piece of fabric, soil, and ants.
How do I set up the ant farm?
Place the smaller mason jar inside the larger one, fill the space between the jars with a soil-and-sand mixture, and carefully place the ants inside. Cover the jar with fabric and secure the lid with tiny holes.
How often should I feed the ants?
Feed the ants once a week by placing a few drops of sugar water, honey, or jam on top of the soil.
How can I prevent ant hills from forming?
Treating early and often with ant baits, granules, or sprays can help stop colonies from establishing on your property.
How do I identify queen ants?
Visual guides and advanced resources can help in identifying queen ants. Pay attention to flight patterns, time of day, and the species of ants in your area.
What should I do if I have multiple ant hills?
Different methods such as drenching, ant bait stations, granules, or broadcast sprays can be employed depending on the size of the infestation. Treat all the ant hills simultaneously.
Can I use household items like bleach or vinegar to control ants?
It is best to use approved insecticides or natural methods that are safe and effective. Household items like bleach or vinegar may have harmful effects on the environment and pose safety risks.
How do I treat ant infestations in the winter?
Ant colonies are typically dormant in the winter, so it’s best to wait until early spring when they become active again for treatment.
Source Links
- https://www.reddit.com/r/antkeeping/comments/8dzsgm/beginners_budget_guide_to_starting_an_ant_farm/
- https://www.abeka.com/blog/mason-jar-ant-farm/
- https://todayshomeowner.com/pest-control/guides/how-to-get-rid-of-ant-hills/
More Pet Tips:
 Top-Quality Ant Farm Refill Supplies for your Colony!
 Complete Queen Ant Care Guide: Tips for Healthy Colonies
 Begin Your Colony with our Ant Farm Starter Kit!
 Exploring Ants and Social Structures: A Fascinating Insight
 Mastering Ant Farm Cleaning Tips: Keep Your Colony Thriving
 Decoding the Ant Colony Growth Timeline: A Fascinating Journey
